Fighter · Military · Japan
Mitsubishi A6M Zero
- In service
- Status

-1600.webp)


_off_Okinawa%2C_Japan%2C_on_11_April_1945_(NH_75767)-1600.webp)
-1600.webp)



_leaves_flaming_trail_over_Palau._-_NARA_-_520982-1600.webp)


-1600.webp)


-1600.webp)
-1600.webp)




-1600.webp)

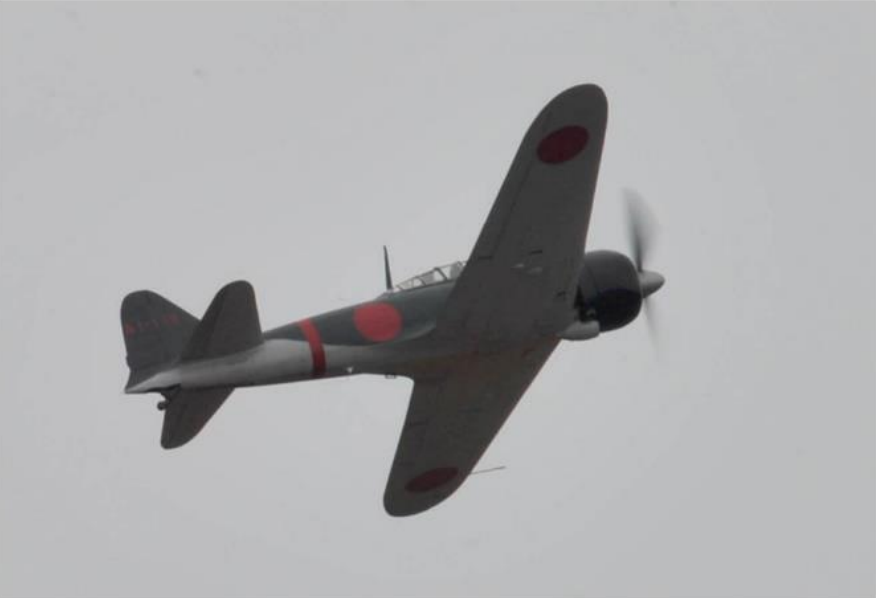
-1600.webp)
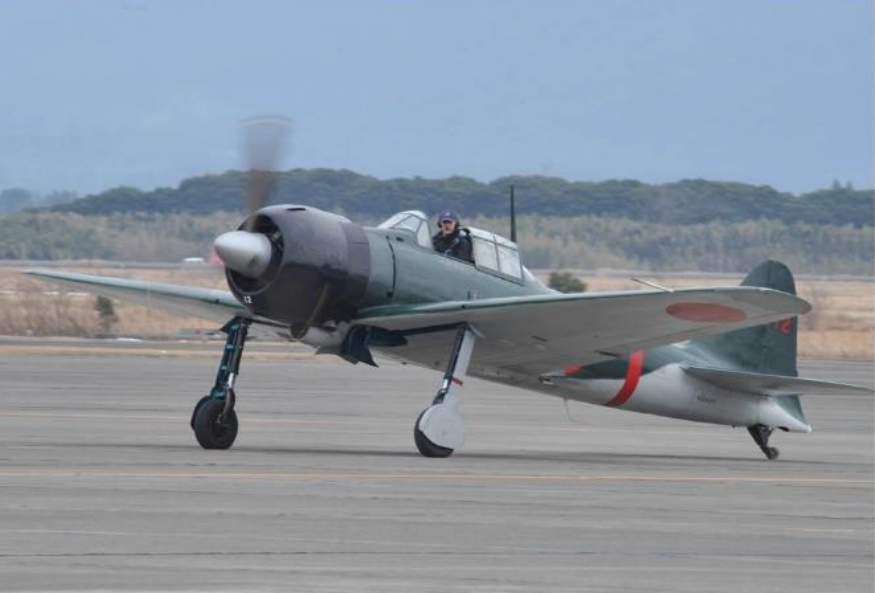


-1600.webp)

-800.webp)

-1600.webp)
The Mitsubishi A6M was the carrier fighter with which the Imperial Japanese Navy fought the Pacific War from beginning to end. Its official designation was Type 0 carrier fighter (零式艦上戦闘機, rei-shiki kanjō sentōki); the zero came from the last digit of imperial year 2600 — 1940 — when it entered service, and its own pilots called it Reisen or Zero-sen. When the Allies introduced a code-name system for Japanese aircraft in 1942 they assigned it "Zeke", but the name that stuck in the West was simply "Zero". The programme began on 5 October 1937, when the Navy sent Mitsubishi and Nakajima the planning requirements for the 12-shi carrier-based fighter prototype; that same October it updated them in the light of what its predecessor, the A5M, had met in China: 500 km/h at 4,000 m, a climb to 3,000 m in 9.5 minutes, two 20 mm cannon and two 7.7 mm machine guns, a radio set and a direction finder for long-range navigation, manoeuvrability at least equal to the A5M's, and a wingspan under 12 m so the aircraft could operate from carriers. Mitsubishi's chief designer, Jiro Horikoshi, concluded the specification could be met only if the aircraft were made as light as possible, and that decision defined it: no armour was provided for the pilot, the engine or any other critical point, and the self-sealing fuel tanks then becoming standard among other combatants were left out. The result was an exceptionally agile fighter and one of the longest-ranged single-engine aircraft of the war — able to seek out an enemy hundreds of kilometres away, bring him to battle and return to base or carrier — but also one prone to catching fire when hit. The first two A6M1 prototypes, powered by the 580 kW (780 hp) Mitsubishi Zuisei 13 with a two-blade propeller, were completed in March 1939, and the first flew on 1 April. The Navy suggested fitting the third with the 700 kW (940 hp) Nakajima Sakae 12, and with that engine the A6M2, completed in January 1940, pushed performance well past the original specification. In July 1940 the first aircraft reached Manchuria and in August they entered combat over Chongqing, where they proved untouchable by the Polikarpov fighters that had given the A5M so much trouble; on 13 September 1940 thirteen A6M2s led by Lieutenant Saburo Shindo, escorting twenty-seven G3M bombers, engaged thirty-four Chinese I-15s and I-16s and claimed twenty-seven kills without loss to themselves. In its most widely used early form, the Model 21, the aircraft was 9.06 m long with a span of 12 m and a height of 3.05 m, 22.44 m² of wing area, 1,680 kg empty and 2,796 kg loaded; it reached 533 km/h at 4,550 m, cruised at 333 km/h, climbed at 15.7 m/s, had a ceiling of 10,000 m and a range of 1,870 km that extended to 3,100 km in ferry configuration with a drop tank. The advantage did not last. In early operations the Zero earned its reputation as an unbeatable dogfighter — the English Wikipedia credits it with a twelve-to-one kill ratio in that period — but by mid-1942 a combination of new tactics and better equipment let Allied pilots meet it on generally equal terms. Two assets counted for much: the weave developed by John Thach, which cancelled the Zero's turning advantage by working in pairs, and Petty Officer Tadayoshi Koga's A6M2 Model 21, which crash-landed on Akutan Island, Alaska, and was recovered essentially intact by the Americans in July 1942, allowing the fighter to be studied in detail. To these were added aircraft designed with the Zero in mind — the Grumman F6F Hellcat, the Vought F4U Corsair, the Lockheed P-38 Lightning — and the design's own limits: with no hydraulic boosting for ailerons and rudder it grew hard to manoeuvre at high speed. From mid-1943 the decline in Japanese naval fighter pilot training deepened the disadvantage, and in June 1944, at the Battle of the Philippine Sea, the Zero squadrons were destroyed by American carrier aviation. Mitsubishi tried to keep the aircraft current to the end: the A6M7, with a Sakae 31 of 1,130 hp and a centreline rack for a 250 kg bomb, was a thorough reworking meant to turn it into a carrier dive bomber. Its intended successor, the A7M Reppū, never arrived in time, so the Zero stayed in front-line service until 1945 and ended its career as a suicide-attack aircraft in the kamikaze operations of the war's final year. Total production is usually given as some 10,939 aircraft between Mitsubishi and Nakajima, which built it under licence, though Wikipedia also records the 10,934 of the USSBS report: no primary source breaking the total down by plant and variant has been located, and the figure should be treated as attributed. Of the aircraft that defined Japanese naval air power there remain museum pieces — the National Air and Space Museum holds an A6M5 Model 52 — and a persistent cultural presence, from the replicas built for Tora! Tora! Tora! to Horikoshi as a figure of fiction.
Category
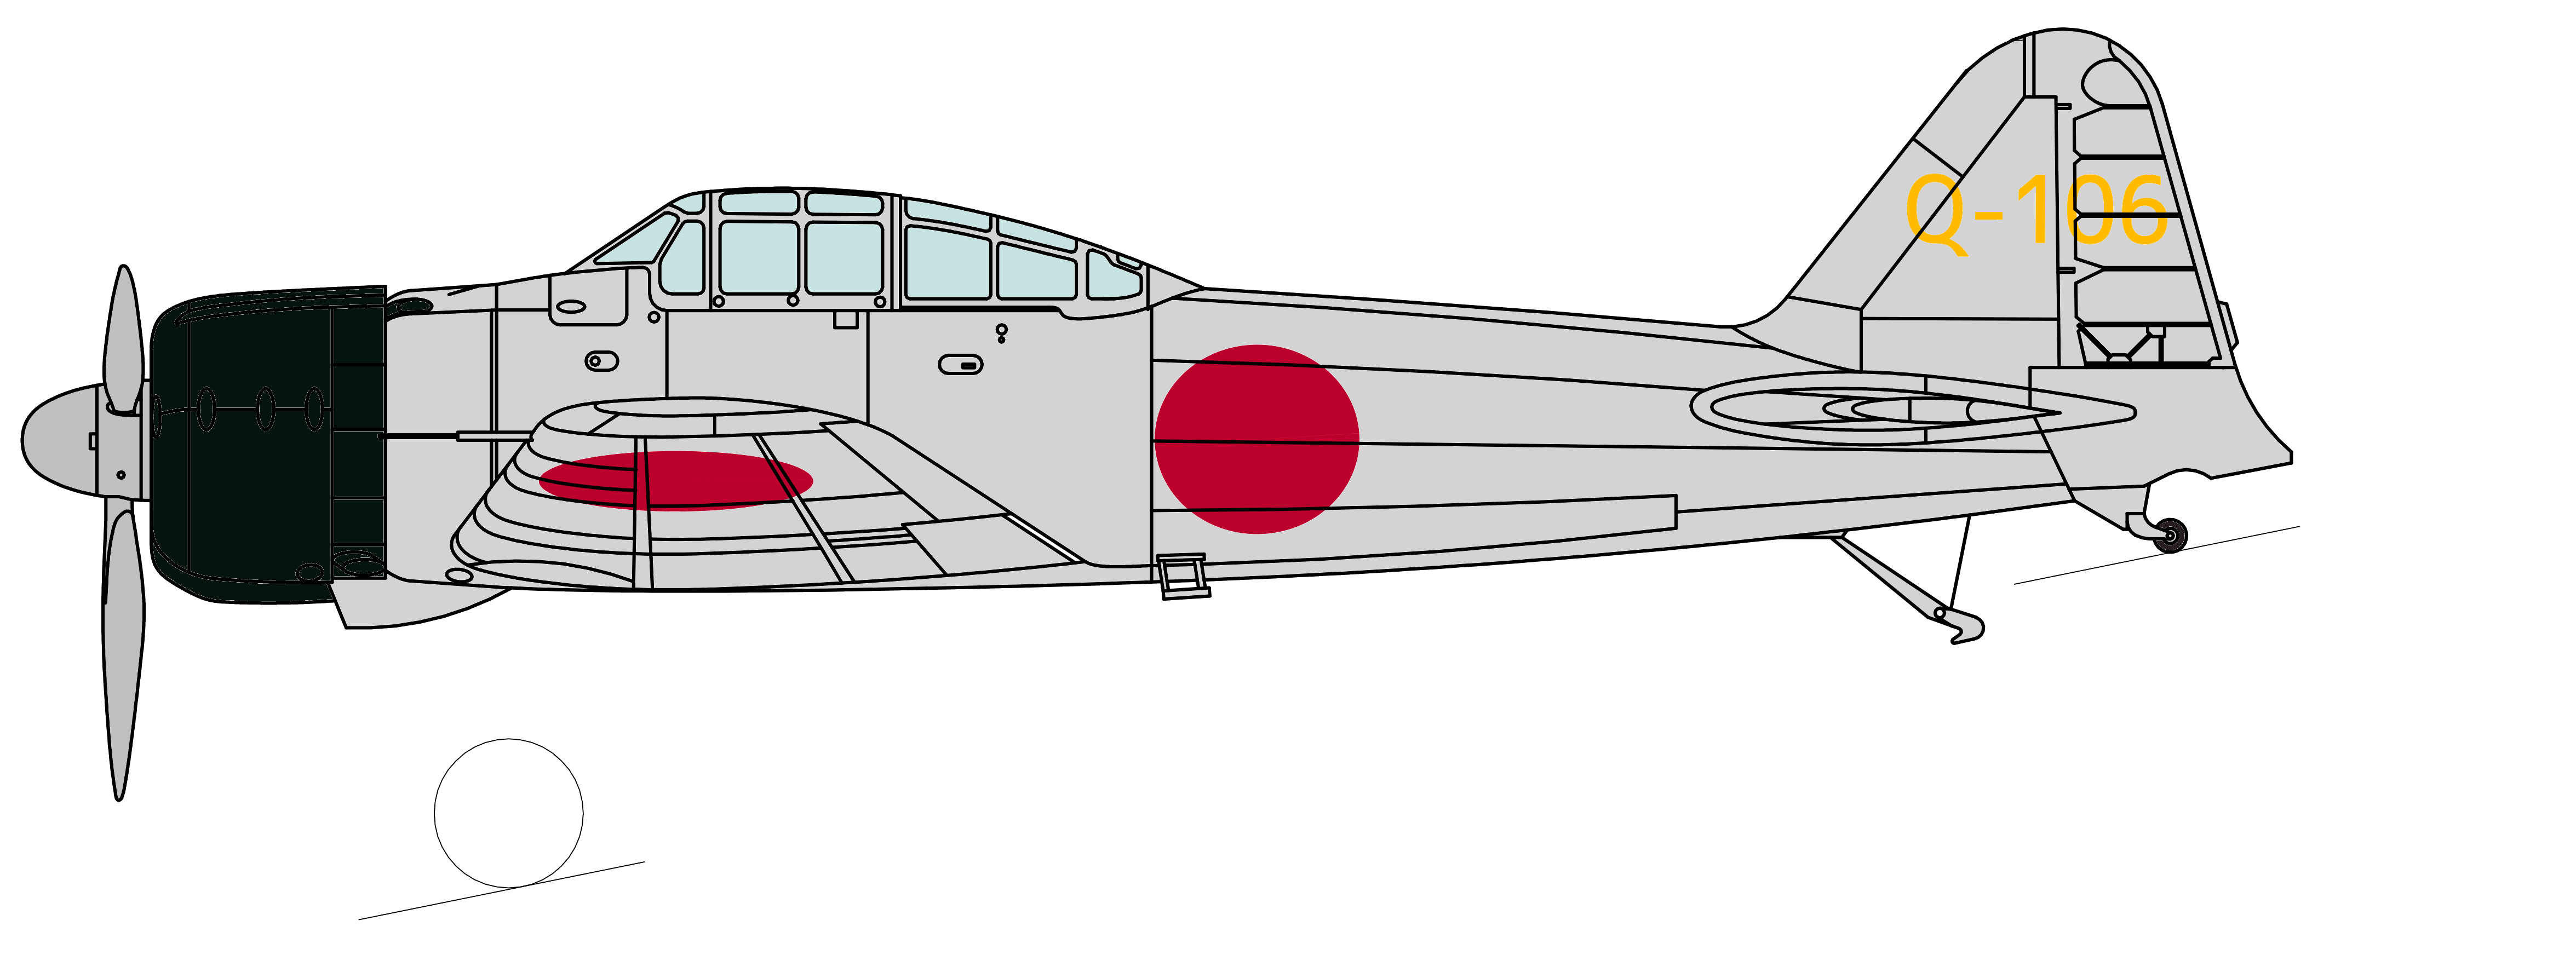
Three-view drawing
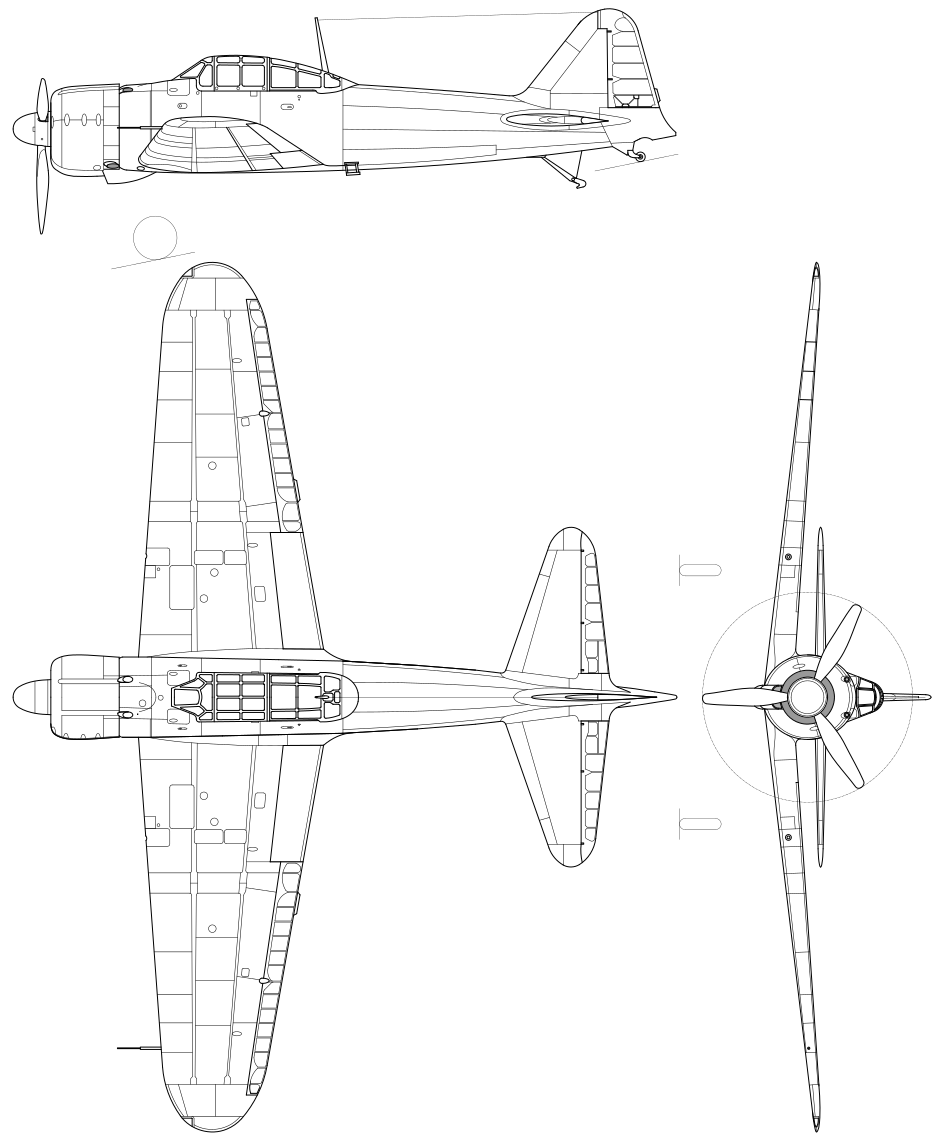
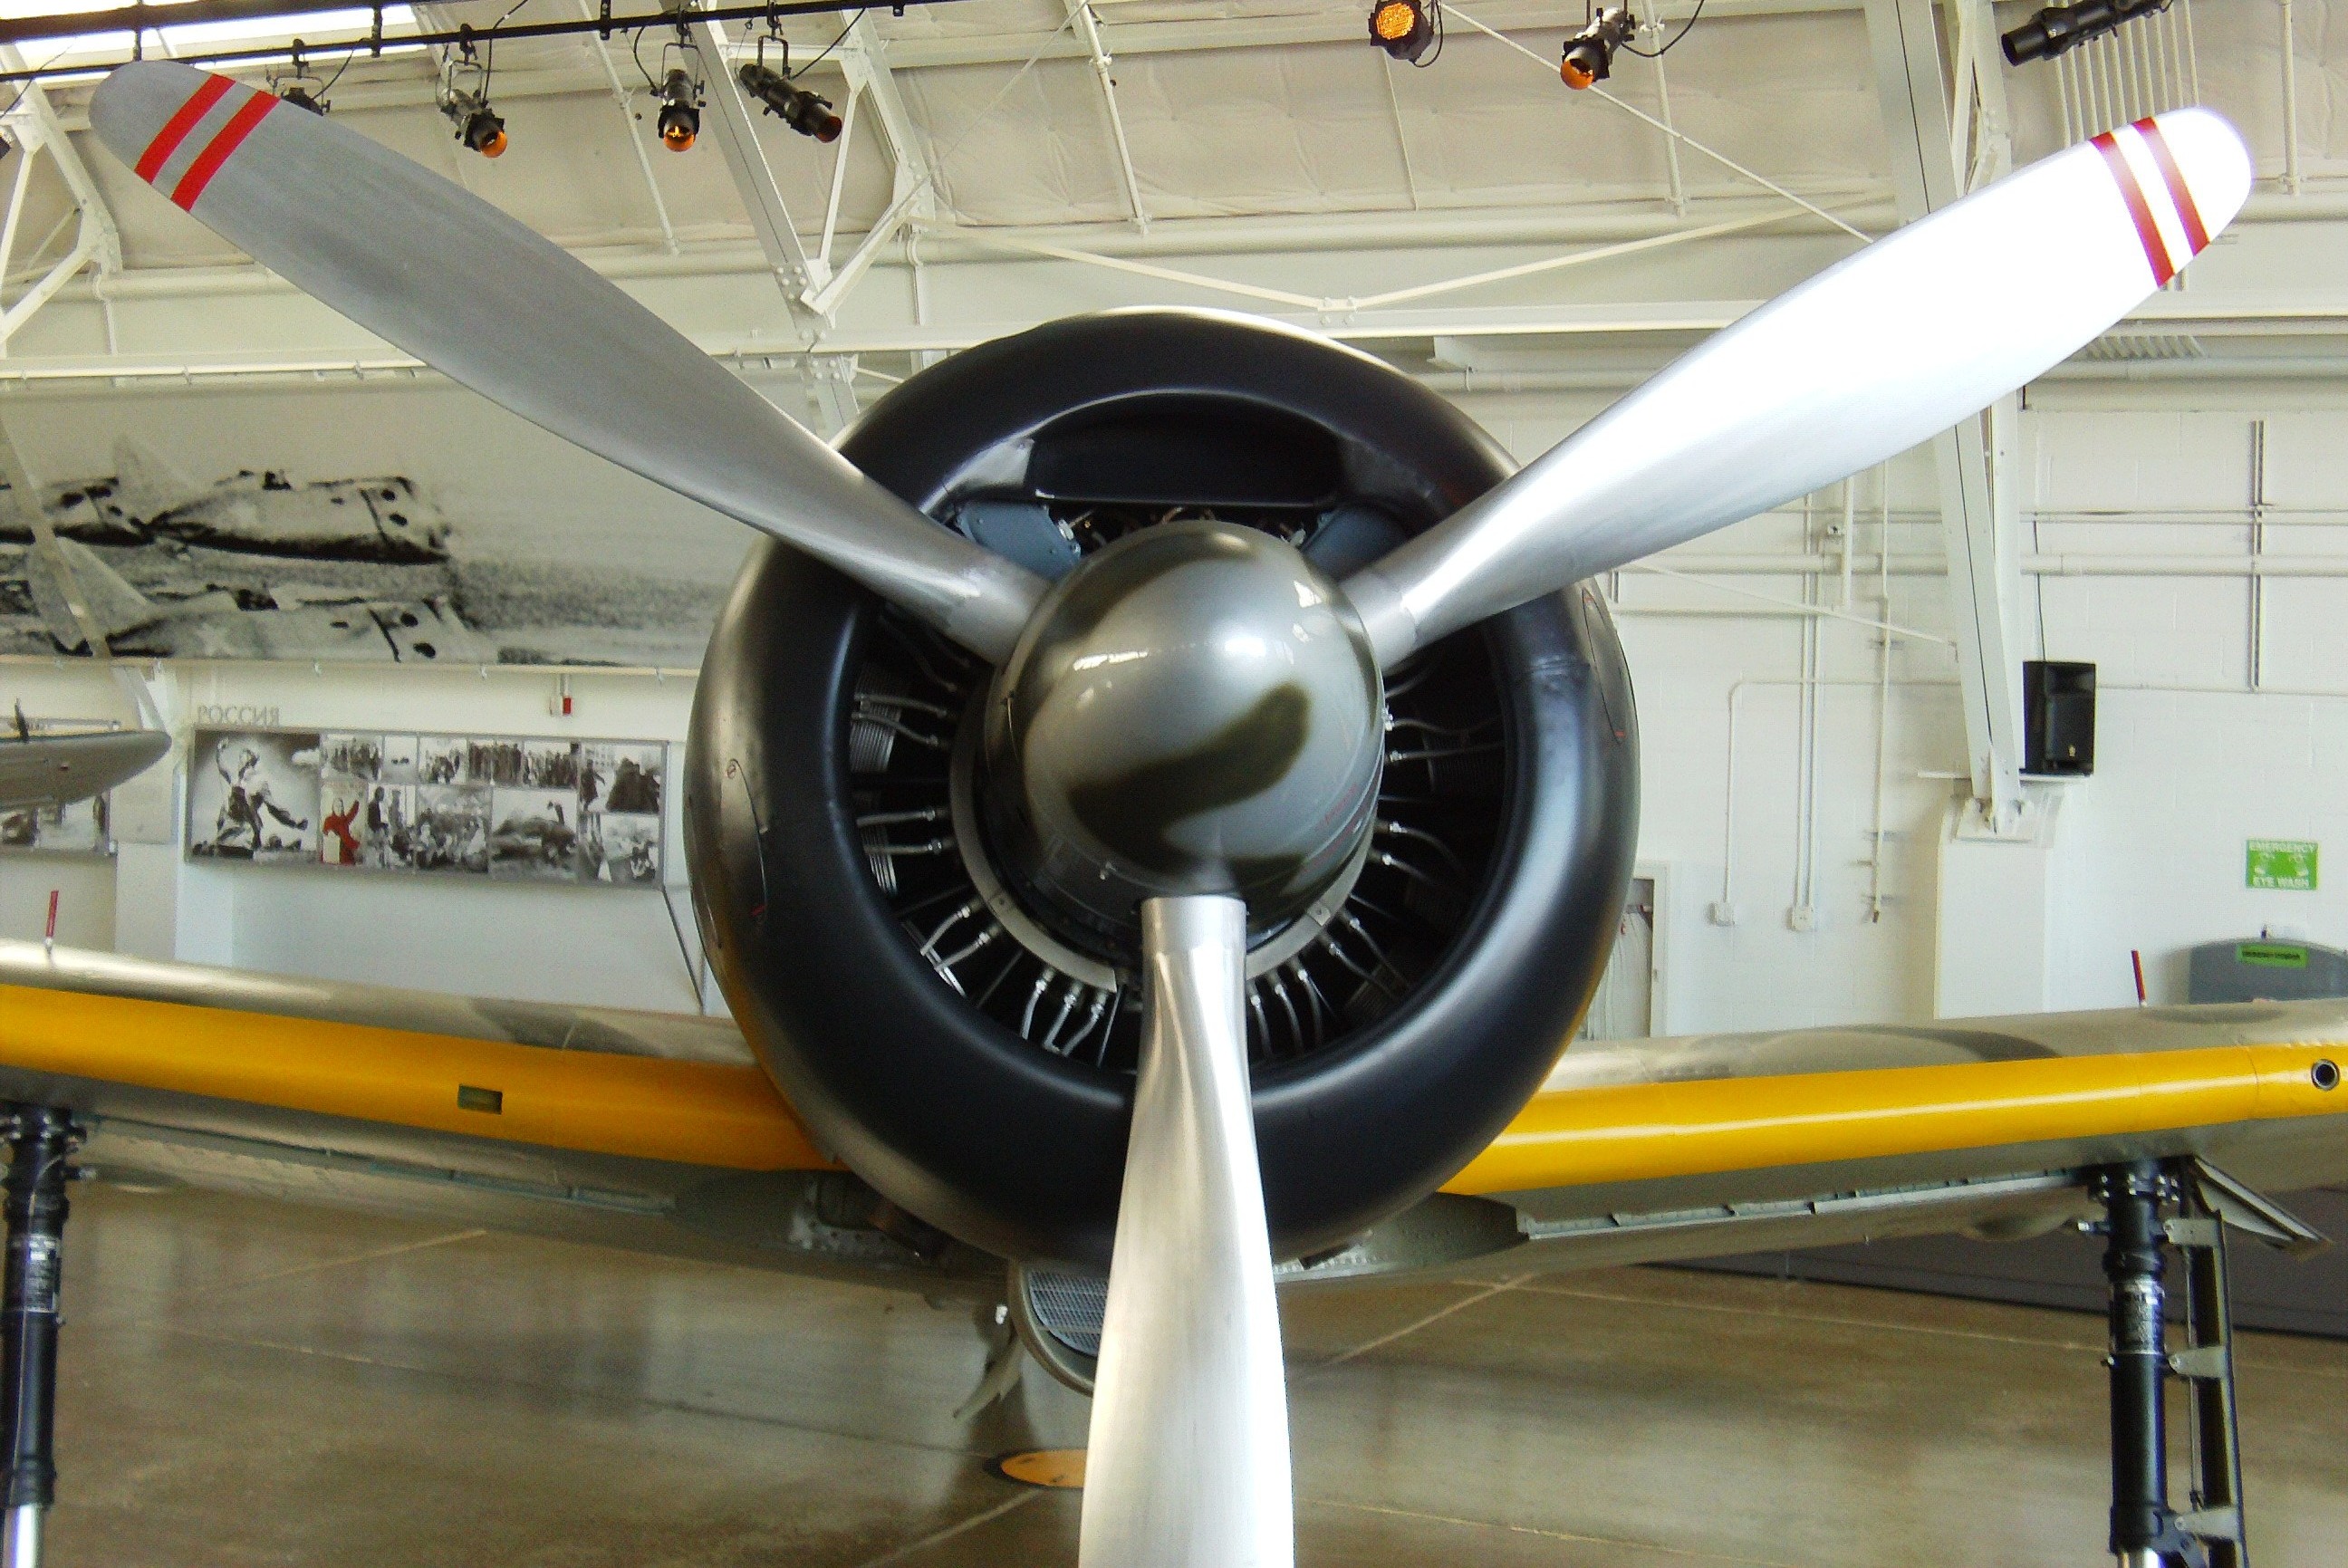
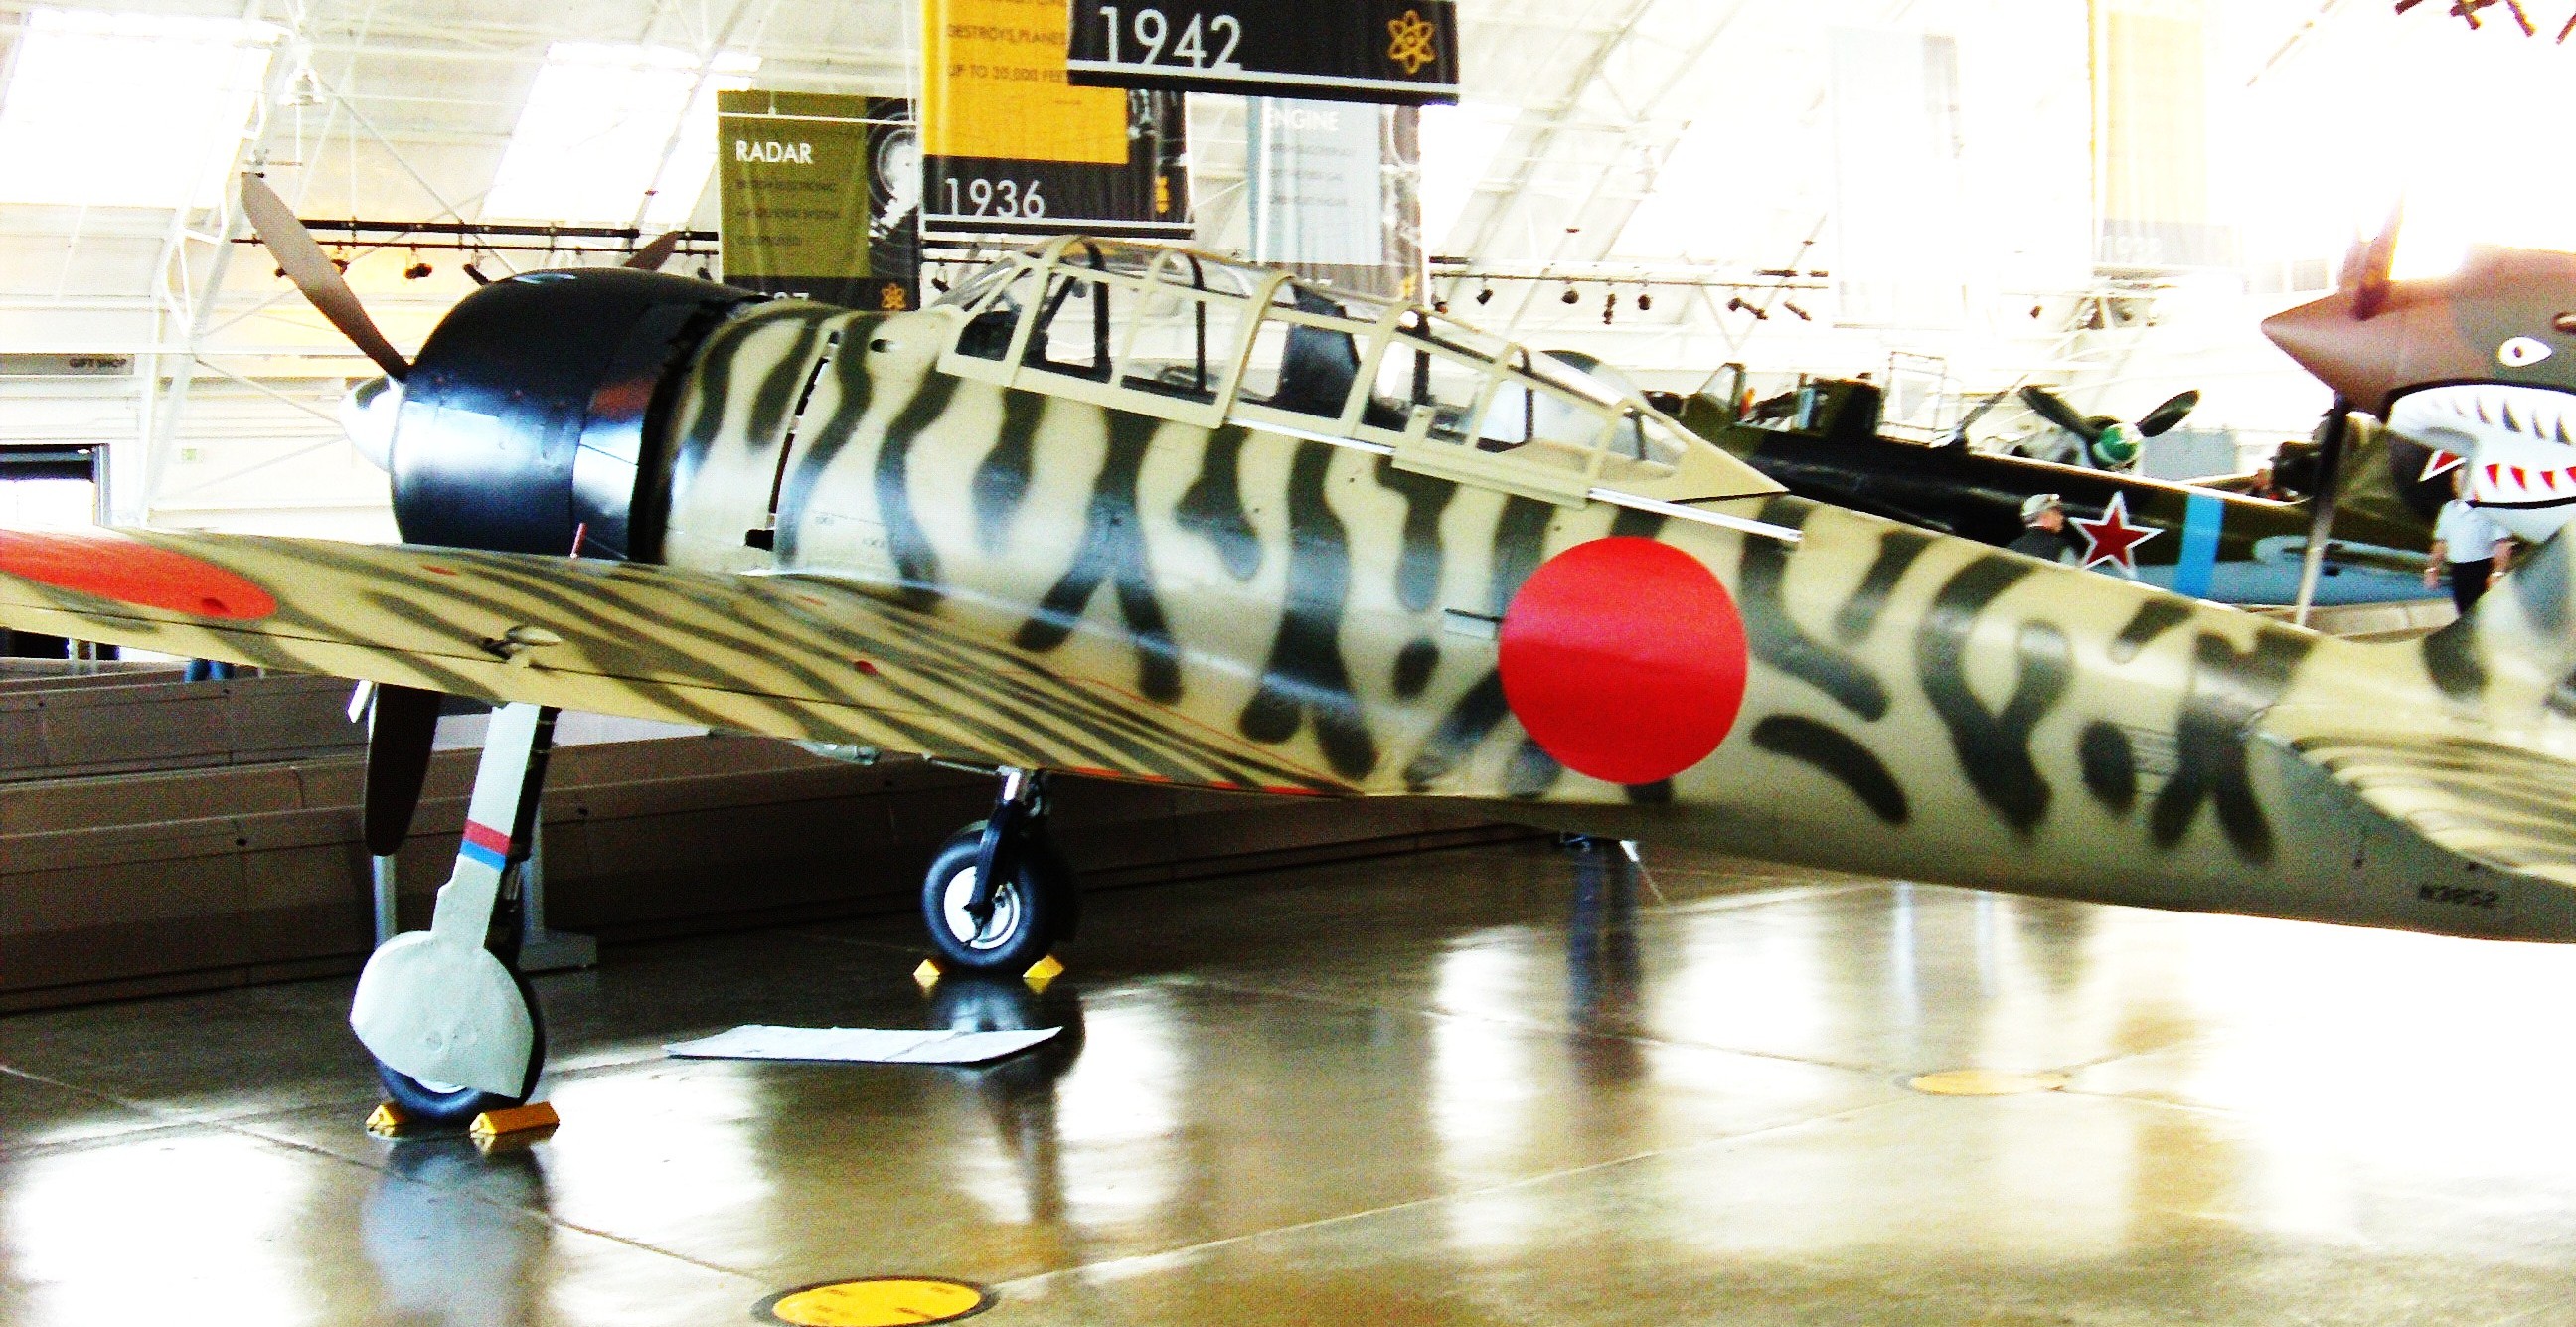
History
Origins: the 12-shi specification
The Mitsubishi A5M was only just reaching front-line units in early 1937 when the Imperial Japanese Navy began looking for its replacement. On 5 October 1937 it sent Nakajima and Mitsubishi the planning requirements for a prototype 12-shi carrier-based fighter, and a few months later, having absorbed the lessons of the A5M over China, it tightened those requirements to a point that seemed self-contradictory: 500 km/h at 4,000 m, a climb to 3,000 m in nine and a half minutes, two hours of endurance at normal power and six to eight hours at economical cruise with drop tanks, an armament of two 20 mm cannon, two 7.7 mm machine guns and two 60 kg bombs, a full radio set with a direction finder for long-range navigation, manoeuvrability no worse than the A5M's, and a wingspan under 12 m so the aircraft could work from carrier decks. Nakajima's team judged the package unachievable and withdrew from the competition in January.
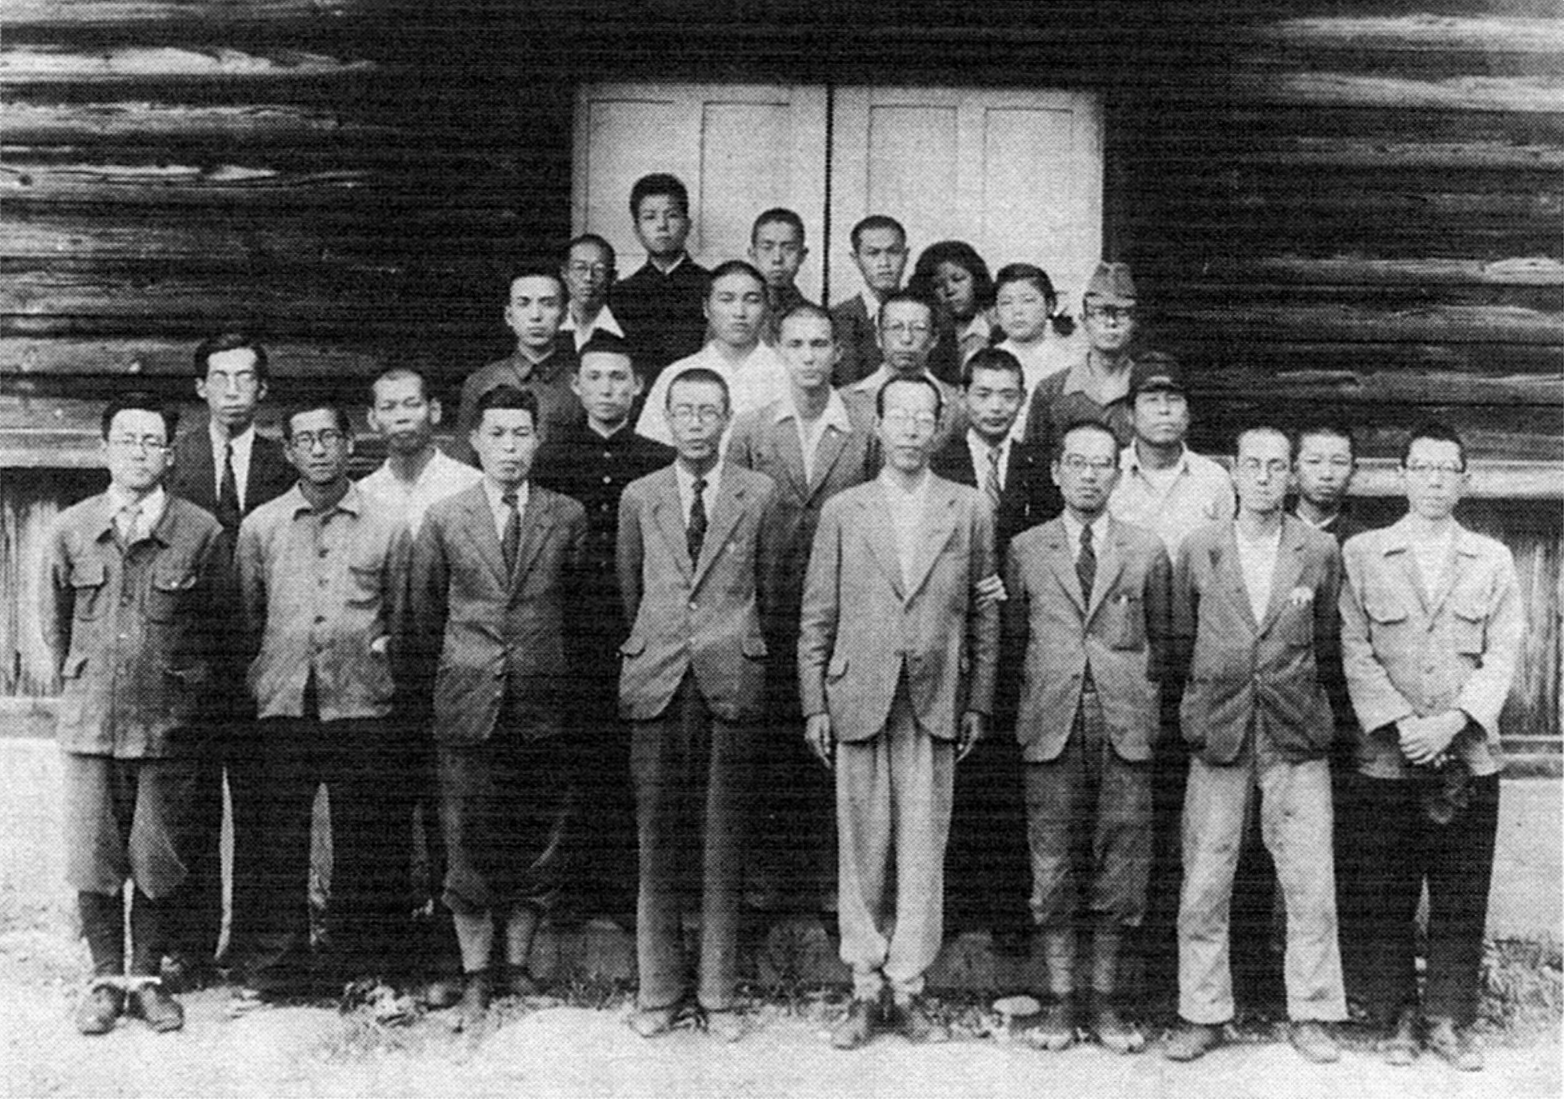
Mitsubishi's chief designer, Jiro Horikoshi, reached the opposite conclusion: the figures could be met, but only if the aeroplane were built as light as physics allowed. Born in 1903 near Fujioka, in Gunma Prefecture, Horikoshi had trained at the newly founded aviation laboratory in the engineering faculty of the University of Tokyo and had spent his whole career at the Nagoya works that would become part of Mitsubishi Heavy Industries. The project handed to him in 1937 was known internally as Prototype 12, after the twelfth year of the Shōwa era.
The design: weight as an obsession
Every decision on the 12-shi was subordinated to saving grams. The structure was built almost entirely from a secret aluminium alloy developed by Sumitomo Metal Industries in 1936, "extra super duralumin", lighter, stronger and more ductile than contemporary alloys but so vulnerable to corrosion that it turned brittle; the cure was a zinc chromate coating applied after fabrication. No armour was fitted for the pilot, the engine or any critical point of the airframe, and the self-sealing tanks then becoming standard among the other belligerents were left out. The result was an exceptionally light and agile fighter with a radius of action unmatched among single-engine types of the war, able to seek out an enemy hundreds of kilometres from its base or carrier, fight, and return. The price was written in from the first day: a lucky hit in the tanks was enough to set it ablaze.
Aerodynamically it was as modern as anything then operating from a flight deck: a low-wing cantilever monoplane with wide-track retractable gear and an enclosed cockpit. The high-lift, low-speed wing gave very low wing loading and a stalling speed below 60 knots, and from that came the agility that let it out-turn any Allied fighter of the period. Early aircraft were given servo tabs on the ailerons because pilots complained that control forces stiffened above 300 km/h; they were dropped on later models once it became clear that lighter controls let pilots overstress the wing in violent manoeuvres.
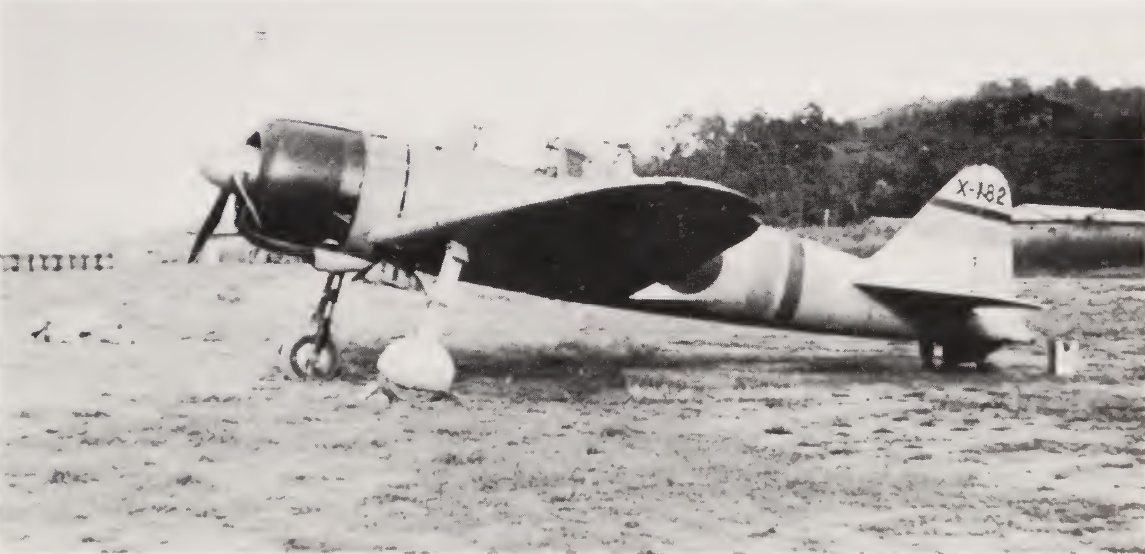
Two A6M1 prototypes were finished in March 1939, powered by a 780 hp Mitsubishi Zuisei 13 driving a two-blade propeller. The first flight came on 1 April and testing was passed remarkably quickly: by September the aircraft had been accepted for Navy trials, the only notable change being a three-blade propeller to cure a vibration. While the first two machines were still being tested, the Navy suggested fitting the third with the 940 hp Nakajima Sakae 12. Mitsubishi was reluctant, having its own engine of that class in the Kinsei, but the first A6M2, completed in January 1940, cleared the specification comfortably on the Sakae's additional power.
The name
The full Japanese designation was Rei shiki Kanjō sentōki, Type 0 carrier fighter, taken from the last digit of Imperial year 2600, equivalent to 1940, when it entered service. In Japan it was called both Rei-sen and Zero-sen, the latter being the usual form among pilots. In the short designation A6M, "A" meant carrier fighter, "6" that it was the sixth such model built for the Navy, and "M" identified Mitsubishi. The Allies assigned it the code name "Zeke" in 1942, part of the first batch chosen by Captain Frank T. McCoy at the Allied technical air intelligence unit in Australia, who wanted labels that were quick and easy to remember. Two variants got names of their own: the A6M2-N floatplane was "Rufe", and the A6M3-32 was first called "Hap" until General Arnold, commander of the US Army Air Forces, objected to the nickname and it became "Hamp".
Baptism of fire over China
The Navy did not wait for testing to finish: it ordered fifteen pre-production machines and sent them to China. They reached Manchuria in July 1940 and went into action with the 12th Rengō Kōkūtai as part of the bombing campaign against Chongqing and Chengdu. The first documented air combat came on 13 September 1940, when thirteen A6M2s led by Lieutenant Saburo Shindo, escorting twenty-seven G3M medium bombers over Chongqing, met thirty-four Polikarpov I-15 and I-16 fighters of the Chinese Nationalist air force. The Japanese pilots claimed all twenty-seven Chinese fighters they identified destroyed without loss to themselves; on the Chinese side ten pilots were killed and eight wounded, and Major Louie Yim-qun brought an I-15 home with forty-eight bullet holes in it. At most four Zeros took damage in the half-hour engagement. By the time the units were pulled out of the Chinese theatre a year later they were credited with 99 Chinese aircraft shot down, and up to 266 according to other sources.
The effect was immediate: the Chinese air command issued instructions to avoid combat with the new fighter. They were not always obeyed, and engagements such as the one over Chengdu on 14 March 1941, which cost eight Chinese pilots their lives, confirmed the mismatch. The last recorded dogfight between Chinese fighters and Navy Zeros took place on 11 August 1941, shortly before every unit equipped with the type left China to prepare for the operation against Pearl Harbor. Early and accurate Allied reports did exist: two A6M2s fell into Chinese hands more or less intact, the wreck of V-110 examined in September 1940 by a team that included Western volunteers, and V-173 after a forced landing on 17 February 1941, the latter repaired and flown extensively by a team that included Gerhard Neumann. The reports were met with scepticism, since most American officers did not believe Japan capable of building such an aircraft.
The year of dominance
At the time of the attack on Pearl Harbor there were 521 Zeros active in the Pacific, 328 of them in first-line units. The type the Americans met was the carrier-borne Model 21, whose radius of action of over 2,600 km let it appear far further from its carriers than anyone expected and led Allied commanders to credit the Japanese with several times the number of aircraft actually in service. The combination of manoeuvrability and firepower disposed easily of the fighters sent against it in 1941, and the A6M proved a difficult opponent even for the Supermarine Spitfire: without being faster, it out-turned the British fighter, sustained a very steep climb, and could stay airborne three times as long.
The cracks: Akutan, the Thach weave and attrition
The Allied answer came along two lines, technical and tactical. On 4 June 1942, during a raid on Dutch Harbor, anti-aircraft fire hit an A6M; Flight Petty Officer Tadayoshi Koga tried an emergency landing on Akutan Island, some 32 km to the north-east, and the aircraft flipped over on soft ground. Koga died instantly and his wingmen, hoping he had survived, refrained from destroying the machine as doctrine required. An American salvage team found it more than a month later and shipped it to Naval Air Station North Island, where test flights of the repaired Zero revealed both its virtues and its limits. The evaluators measured about 2,360 kg fully loaded, roughly 1,260 kg less than the F4F Wildcat then standard in the US Navy; they described an airframe built like a fine watch, with flush rivets and guns flush with the wings, and an instrument panel of exemplary simplicity. What struck them most was that fuselage and wings were built in one piece, a slower method than the American one but one that produced a very strong structure. Test pilots found the controls very light at 320 km/h but stiffening above 348 km/h to protect the wing, established that the aircraft could not follow Allied types in high-speed manoeuvres, that its low never-exceed speed made it vulnerable in a dive, and that it did not roll to the right as quickly as to the left, a detail that could be exploited.
The tactical answer was the diving pass: come down from above at high speed, fire a short burst and climb away, never entering a sustained turn. That was how the F4Fs fought in the defence of Guadalcanal, backed by a warning network of coastwatchers and radar, and how the P-40s of the American Volunteer Group fought in the China-Burma-India theatre, trained by Claire Lee Chennault to exploit their aircraft's ruggedness, armament and diving speed. To this was added the defensive formation devised by Lieutenant Commander John S. Thach, the Thach weave: two fighters flying about 60 m apart which, as soon as a Zero settled on the tail of one of them, turned towards each other, bringing the pursuer into the wingman's sights. Thach first tested it in combat at Midway in June 1942, when a squadron of Zeros attacked his flight of four Wildcats, and the manoeuvre became standard in the Navy and was adopted by Army fliers as well; it was used to good effect again over the Solomons and at the Battle of the Santa Cruz Islands.
The Japanese ace Saburō Sakai recorded the other factor: the structural toughness of Grumman aircraft, which in his account absorbed hundreds of 7.7 mm rounds without falling, something unthinkable in a Zero. Armour, protected tanks and new tactics together exacted a heavy price among veteran Japanese airmen. Aircrew losses in the Coral Sea, at Midway, in the Eastern Solomons and at the Santa Cruz Islands, all in 1942, cost the Japanese carrier air arm a core of experience it never rebuilt, and the steady decline in average pilot quality became a decisive factor in Allied success.
Decline
The arrival in theatre of the Lockheed P-38 Lightning, the Grumman F6F Hellcat and the Vought F4U Corsair changed the terms of the problem. Against faster, better-protected aircraft armed with six .50-calibre machine guns, or four plus a 20 mm cannon in the P-38's case, a fighter with neither armour nor self-sealing tanks had little margin. Worse, the A6M could not be improved: its engine and airframe had no capacity to absorb the weight that protection and heavier armament demanded, and adding them would have destroyed the very manoeuvrability that justified the design. From 1943 it remained lethal in competent hands, and units based at Rabaul and Lae with experienced pilots fought Corsairs, Lightnings and Hellcats over New Guinea to something close to parity for months. In late 1943, with Japan turning to the defensive, the naval staff at Rabaul discussed for the first time giving the Zero bullet protection: the type's purely offensive qualities, beginning with its range, had ceased to be necessities. That same staff still regarded it as the best fighter in the theatre, while conceding that the Corsair's speed in level flight made it a match.
By the time the war reached the Marianas the decay was irreversible. At the Battle of the Philippine Sea in June 1944, a patrolling A6M found Task Force 58 at 05:50 and was shot down shortly afterwards; the aircraft based on Guam took off to attack and thirty-five of them were destroyed for the loss of a single Hellcat. The first wave from the Japanese carriers, 68 aircraft strong, lost twenty-five machines within minutes for one American aircraft and sixteen more immediately after, and none reached the enemy carriers. A fourth wave, misdirected, was intercepted while landing on Guam, where thirty of forty-nine aircraft were shot down and the rest damaged beyond repair. American aviators christened the day the Great Marianas Turkey Shoot; the imbalance is generally attributed to an abundance of well-trained Allied pilots, to superior tactics and to the new anti-aircraft proximity fuze, set against Japanese replacement crews with few flying hours and almost no combat experience.
In the defence of the home islands the A6M remained the most numerous Japanese fighter, but the P-51 Mustang outclassed it in the altitude band where the raids operated, even if at low and medium level the Zero could still out-turn or out-climb it. On 29 May 1945, 150 A6Ms tried to intercept a daylight incendiary attack on Yokohama flown by 517 B-29s escorted by 101 P-51s: five B-29s fell and a further 175 returned damaged, while the Mustangs claimed twenty-six kills and twenty-three probables for three fighters lost. The 454 B-29s that reached the target destroyed 18 km² of the city's main business district, and over a thousand people were killed.
Late variants, kamikaze and the successor that never came
The family evolved without ever escaping its original compromise. After the initial Model 11, folding wingtips were introduced from the sixty-fifth aircraft onward to give the Model 21, the emblematic version of the war's first half, with a 520 l wing tank and a 320 l drop tank; 740 were completed by Mitsubishi and another 800 by Nakajima. On that basis Nakajima built the A6M2-N "Rufe" floatplane, and Hitachi and the Sasebo naval air arsenal delivered 508 A6M2-K two-seat trainers. The Sakae 21, with a two-speed supercharger and 1,130 hp, flew in a Zero on 15 July 1941 and produced the A6M3 Model 32: to offset the shift in centre of gravity the engine mountings were cut back by 185 mm, which reduced the main fuselage tank from 518 to 470 l, and the wing was shortened by deleting the folding tips. The result gained barely 11 km/h and gave up nearly 1,000 km of range, a serious error in the Solomons campaign, where Zeros from Rabaul flew close to their limit to reach Guadalcanal and return; only 343 were built. The correction came with the Model 22, which restored the folding tips and raised internal fuel to 570 l: some 560 aircraft were ready by December 1942, before the type had even been formally accepted.
The A6M5 Model 52, with a shortened, square-cut wing, revised ailerons and flaps and a new exhaust system that contributed residual thrust, is often considered the most effective variant: it reached 565 km/h at 6,000 m and climbed to that altitude in seven minutes and one second. It flew in August 1943 and was built mainly at Nakajima's Koizumi plant, with a chain of refinements identifiable by production number: carbon dioxide fire extinguishers in the wing tanks from 4274, the Model 3 radio from 4354, shortened lower exhaust stacks from 4551, and from 4651 a belt-fed Type 99-2 Mark 4 cannon carrying 125 rounds per gun, replacing the earlier drum-fed weapon and its 100. The sub-variants gradually added what the original design had refused: the 52b traded a 7.7 mm gun for a 13.2 mm weapon and added 45 mm armoured glass, while the 52c added 13.2 mm guns in the wings, 8 mm of armour behind the seat, 55 mm armoured glass at the headrest and rails for rockets; it gained so much weight that it was used chiefly to intercept B-29s and for special attack. There were also night-fighter conversions with a 20 mm cannon behind the pilot firing obliquely upward, ineffective for want of radar, and fighter-bombers carrying a 250 kg bomb in place of the ventral drop tank.
The last rungs of the ladder were never finished. Only one prototype of the A6M6, with a Sakae 31a and water-methanol injection, was built. The A6M7 Model 62/63, with a reinforced fin and a rack for 250 or 500 kg bombs, entered production in May 1945 and was the last variant in service, also used for suicide attacks. The A6M8 replaced the Sakae, by then out of production, with a 1,560 hp Mitsubishi Kinsei 62, sixty per cent more powerful than the A6M2's engine, which forced a complete redesign of cowling and nose: two prototypes were completed and flown in April 1945, but nothing came of the planned programme of 6,300 aircraft. Nor did the successor arrive. The A7M Reppū, ordered from Horikoshi in 1942 with a requirement to exceed 639 km/h above 6,000 m while keeping the A6M3's manoeuvrability, was crippled by its powerplant: the first prototype, with a 2,000 hp Nakajima Homare 22, was underpowered and only eight A7M1s were built, and the design never got past prototypes, although Saburō Sakai, who tested it at Nagoya in June 1945, came away impressed.
The type's final role was one no designer had foreseen. When Vice Admiral Takijirō Ōnishi organised the first special attack unit in the Philippines in October 1944, the 1st Air Fleet based at Manila had just 41 aircraft, 34 of them A6M fighters. It was those machines, carrying bombs, that made up the four original subunits — Shikishima, Yamato, Asahi and Yamazakura, names taken from a poem by the classical scholar Motoori Norinaga — with which the kamikaze campaign began.
Production and legacy
The A6M stayed in production until 1945, which had never been the plan and which is explained by shortages of high-powered engines and by the failure of its successor. Totals differ by source: the United States Strategic Bombing Survey report gives 10,934 aircraft, of which 10,094 were A6M fighters proper, 323 A6M2-N floatplanes and 517 trainers; Francillon raises the total to 11,291, with 10,449 A6Ms, 327 A6M2-Ns, 508 A6M2-Ks and 7 A6M5-Ks. On either count it was the most-produced Japanese fighter of the war.
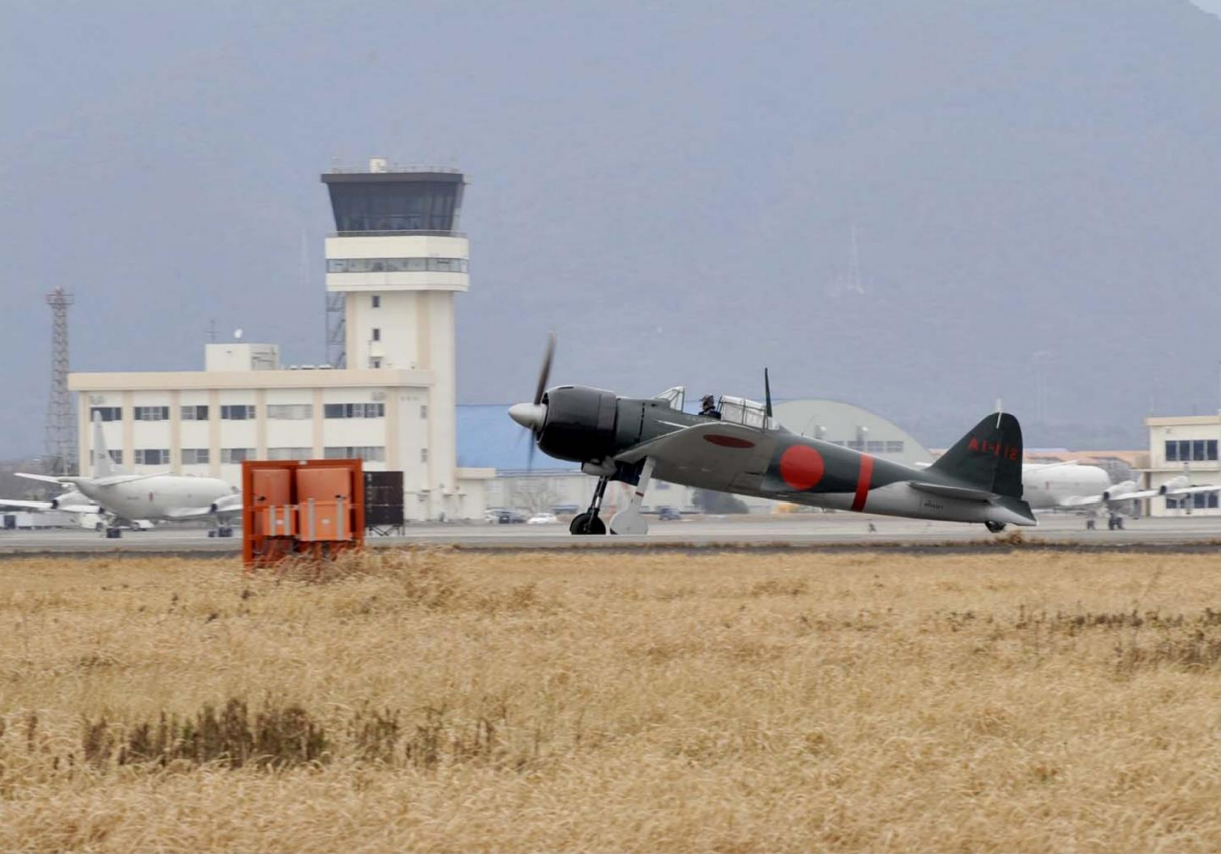
Its reputation outlived its obsolescence. Eric Brown, chief naval test pilot of the Royal Navy, summed up the Allied verdict when he recalled never having flown a fighter that could match the Zero's rate of turn, and that until mid-1943 it was the finest fighter in the world. The A6M remains the symbol of Japanese naval air power in 1941-1942 and, at the same time, the textbook case of a design pushed so far in one direction — lightness, range, manoeuvrability — that it left no room to evolve once the war changed shape. Horikoshi, who after the Zero produced the J2M Raiden and the A7M Reppū, was permanently associated with this aircraft. A few examples survive: the only remaining Model 32 is displayed at the Tachiarai Peace Memorial Museum in Fukuoka, and an A6M5 Model 52 is part of the collection of the Smithsonian's National Air and Space Museum.
Variants
| A6M1 | A6M2a Tipo 0 Modelo 11 | A6M3 Tipo 0 Modelo 32 | A6M5 Tipo 0 Modelo 52 | A6M5b Modelo 52 Otsu | A6M5c Modelo 52 Hei | A6M8 Tipo 0 Modelo 64 | A6M2b Tipo 0 Modelo 21 | A6M2-K | A6M2-N "Rufe" | A6M3 Tipo 0 Modelo 22 | A6M4 Tipo 0 Modelo 41/42 (experimental) | A6M5a Modelo 52 Kō | A6M6 Tipo 0 Modelo 53 | A6M7 Tipo 0 Modelo 62/63 | |
|---|---|---|---|---|---|---|---|---|---|---|---|---|---|---|---|
| First flight | April 1, 1939 | January 1, 1940 | July 15, 1941 | August 1, 1943 | April 1, 1944 | September 1, 1944 | April 1, 1945 | — | — | — | — | — | — | — | — |
| Aircraft type | — | — | — | — | — | — | — | carrier fighter | — | — | — | — | — | — | — |
| Powerplant | — | — | 1 × Nakajima Sakae 21 radial engine with two-speed supercharger, 831 kW (1,130 hp); heavier and slightly longer than the Sakae 12. | — | — | — | 1 × Mitsubishi Kinsei 62 radial engine, 1,163 kW (1,560 hp), 60% more powerful than the A6M2's engine; extensively modified cowling and nose, larger carburettor intake and larger propeller spinner. | 1 × Nakajima Sakae-12 air-cooled radial piston engine, 700 kW (940 hp) for take-off, 710 kW (950 hp) at 4,200 m; 3-bladed Sumitomo-Hamilton constant-speed propeller. | — | — | — | — | — | — | — |
| Powerplant | 1 × Mitsubishi Zuisei 13 | 1 × Nakajima Sakae 12 (NK1C) | 1 × Nakajima Sakae 21 | 1 × Nakajima Sakae 21 | 1 × Nakajima Sakae 21 | 1 × Nakajima Sakae 21 (algunas fuentes citan Sakae 31) | 1 × Mitsubishi Kinsei 62 | 1 × Nakajima Sakae 12 (NK1C) | 1 × Nakajima Sakae 12 (NK1C) | 1 × Nakajima Sakae 12 (NK1C) | 1 × Nakajima Sakae 21 | 1 × Nakajima Sakae con turbosobrealimentador experimental | 1 × Nakajima Sakae 21 | 1 × Nakajima Sakae 31a (con inyección agua-metanol) | 1 × Nakajima Sakae 31 |
| Power per engine | 778 hp | 939 hp | 1,114 hp | — | — | — | 1,560 hp Best value in this row | 939 hp | — | — | — | — | — | — | 1,130 hp |
| Length | — | — | — | — | — | — | — | 9.1 m | — | — | — | — | — | — | — |
| Wingspan | — | — | — | — | — | — | — | 12 m | — | — | — | — | — | — | — |
| Height | — | — | — | — | — | — | — | 3.1 m | — | — | — | — | — | — | — |
| Wing area | — | — | — | — | — | — | — | 22.4 m² | — | — | — | — | — | — | — |
| Empty weight | — | — | — | — | — | — | — | 1,680 kg | — | — | — | — | — | — | — |
| MTOW | — | — | — | — | — | — | — | 2,796 kg | — | — | — | — | — | — | — |
| Top speed | — | — | — | 565 km/h Best value in this row | — | — | — | 533 km/h | — | — | — | — | — | — | — |
| Max speed altitude | — | — | — | 6,000 m | — | — | — | 4,550 m | — | — | — | — | — | — | — |
| Cruise speed | — | — | — | — | — | — | — | 333 km/h | — | — | — | — | — | — | — |
| Service ceiling | — | — | — | — | — | — | — | 10,000 m | — | — | — | — | — | — | — |
| Initial climb rate | — | — | — | — | — | — | — | 15.7 m/s | — | — | — | — | — | — | — |
| Range | — | — | — | — | — | — | — | 1,870 km | — | — | — | — | — | — | — |
| Ferry range | — | — | — | — | — | — | — | 3,100 km | — | — | — | — | — | — | — |
| Range conditions | — | — | — | — | — | — | — | 1,870 km normal range on the 518 L internal tank; up to 3,100 km ferry range with the 330 L drop tank. | — | — | — | — | — | — | — |
| Armament | — | — | — | — | Replaces the 7.7 mm Type 97 fuselage gun with a 13.2 mm Type 3 (Browning-derived, 240 rounds); 45 mm armoured windscreen glass and fairings at the base of the wing cannon. | Adds one 13.2 mm Type 3 machine gun per wing (deleting the 7.7 mm cowl gun) plus four racks for rockets or small bombs; 55 mm armoured glass at the headrest and 8 mm armour plate behind the seat. | 2 × 13.2 mm Type 3 machine guns and 2 × 20 mm Type 99 cannon in the wings; provision for a 250 kg bomb under the fuselage. | 2 × 7.7 mm Type 97 machine guns in the cowling (500 rounds per gun) and 2 × 20 mm Type 99-1 Mk.3 cannon in the wings (60 rounds per gun); up to 2 × 60 kg bombs, or a single fixed 250 kg bomb for late-war kamikaze attacks. | — | — | — | — | 2 × belt-fed 20 mm Type 99-2 Mark 4 cannon (125 rounds per gun), replacing the drum-fed Mark 3 (100 rounds); thicker wing skinning for higher diving speeds. | — | Same layout as the A6M5c, plus a centreline bomb rack for 250 or 500 kg bombs. |
| Max weapons load | — | — | — | — | — | — | 250 kg | 250 kg | — | — | — | — | — | — | 500 kg Best value in this row |
| Payload | — | — | — | — | — | — | — | 0 kg | — | — | — | — | — | — | — |
| Cargo capacity | — | — | — | — | — | — | — | Pure fighter, no civil payload capacity. | — | — | — | — | — | — | Dive-bomber/attack aircraft; no civil payload capacity. |
| Crew | 1 Best value in this row | 1 Best value in this row | 1 Best value in this row | 1 Best value in this row | 1 Best value in this row | 1 Best value in this row | 1 Best value in this row | 1 Best value in this row | 2 | 1 Best value in this row | 1 Best value in this row | — | 1 Best value in this row | 1 Best value in this row | 1 Best value in this row |
| Passengers | — | — | — | — | — | — | — | 0 | — | — | — | — | — | — | — |
| Units built | 2 | — | 343 | — | — | — | 2 | — | 508 | 327 | 560 Best value in this row | — | — | 1 | — |
Images
Elsewhere
- Imperial War MuseumsSección de cabina del Mitsubishi A6M5 Zero capturado (ATAIU-SEA, 1945) ↗
- Imperial War MuseumsRestos del Mitsubishi A6M3 derribado en las islas Marshall (1943) ↗
- Imperial War MuseumsPelícula de reconocimiento aéreo: Mitsubishi 00 (parte 24), 1943 ↗
- Imperial War MuseumsMitsubishi A6M5 Zero 52 «Zeke» en la colección del IWM ↗
- Australian War MemorialRelicto de Mitsubishi A6M2 Modelo 21 del Servicio Aéreo de la Armada Imperial ↗
- Australian War MemorialA6M Zero despegando de un portaaviones japonés (batalla de Santa Cruz, 1942) ↗
- Australian War MemorialMitsubishi A6M2 Reisen: caza monomotor de la Armada japonesa ↗
- Australian War MemorialRestos de un A6M Zero codificado -181, Nueva Bretaña, septiembre de 1945 ↗
- Australian War MemorialA6M2 Zero n.º 4043 abandonado en la pista de Gasmata (Nueva Guinea) ↗
- Australian War MemorialMitsubishi A6M2 «Reisen», nombre aliado «Zeke» ↗
- Australian War MemorialA6M3 Modelo 22 n.º 3844, hoy en el Auckland War Memorial Museum ↗
- Australian War MemorialA6M camuflado de la 22.ª Flotilla Aérea en Kota Bharu, Malaya, 1942 ↗
Show the 22 more
- Australian War MemorialA6M3 Zero capturado en vuelo sobre Brisbane durante las pruebas aliadas ↗
- National Air and Space MuseumMitsubishi A6M5 Reisen Modelo 52 «Zeke» capturado en Saipán (NASM) ↗
- National Air and Space MuseumMitsubishi A6M7 Modelo 63 «Zeke», cazabombardero de 1945 (NASM) ↗
- National Museum of the USAFMitsubishi A6M2 Zero expuesto en el National Museum of the USAF ↗
- National Museum of the USAFCabina del Mitsubishi A6M2 Zero (National Museum of the USAF) ↗
- Planes of Fame Air MuseumMitsubishi A6M5 «Zeke» de Planes of Fame: el único A6M en vuelo con su Sakae original ↗
- Pearl Harbor Aviation MuseumMitsubishi A6M2 Modelo 21 Tipo 0 del Pearl Harbor Aviation Museum ↗
- Auckland War Memorial Museum«The Zero: two men and a plane»: el A6M3 Modelo 22 del museo de Auckland ↗
- Kawaguchiko Zero Fighter MuseumZero Fighter Museum de Kawaguchiko: A6M2 y A6M5 restaurados ↗
- SDASM ArchivesAkutan Zero: el A6M2 recuperado en las Aleutianas (catálogo 01_00085489) ↗
- SDASM ArchivesAkutan Zero en evaluación técnica estadounidense (catálogo 01_00085487) ↗
- SDASM ArchivesAkutan Zero restaurado para pruebas de vuelo (catálogo 01_00085494) ↗
- SDASM ArchivesA6M2 y A6M5 del ATAIU-SEA con marcas británicas de evaluación ↗
- SDASM ArchivesMitsubishi A6M Zero (archivo SDASM, catálogo 01_00085673) ↗
- Pacific WrecksHistoria del A6M3 n.º 3844 recuperado en Bougainville ↗
- Naval History and Heritage CommandNH 89347: A6M en ataque kamikaze ↗
- Naval History and Heritage CommandNH 91339: el A6M2 capturado intacto tras Dutch Harbor (Akutan, 1942) ↗
- Naval History and Heritage Command80-G-33053: A6M entrando al ataque en Pearl Harbor, 7 de diciembre de 1941 ↗
- Naval History and Heritage Command80-G-13040: A6M2 Zero de la fuerza de ataque de Pearl Harbor ↗
- Naval History and Heritage Command80-G-248975: Mitsubishi A6M5 Zero-sen ↗
- Naval History and Heritage Command80-G-307726: Zeros capturados en el aeródromo de Aslito, Saipán (1944) ↗
- National Naval Aviation MuseumA6M2 Zero del National Naval Aviation Museum, reconstruido con restos de Ballale ↗